‘Junk’ food: potato waffles

Sometimes one needs something junky to indulge in, and I was most impressed how unhealthy this tastes haha :D — must be the high fat content! This is a great snack that is free of gluten and sugar.

Making this potato snack or side dish couldn’t be easier. Simply make mashed potatoes by combining boiled waxy potatoes with butter, milk/broth/water, salt and pepper. Spoon into a waffle iron, which has been brushed with melted butter or oil.The final result was not crispy though….

Unlike some frozen potato products, by making this at home you can be assured that there are only natural ingredients.

‘Junk’ food: popcorn

When coated in artificial flavourings, tons of salt and/or sugar, popcorn can be very nasty (think of that fake butter smell from cinema popcorn — yuck!). However, natural popcorn is a great snack option which in its plain form is gluten-free, sugar-free, dairy-free and low in fat, so one can happily indulge!

Here’s how I make it:
* find a large pot with lid
* measure out the desired amount of raw corn kernels — I use three-quarters of one small rice bowl to make a huge salad bowl amount of cooked popcorn
* poor into pot just enough oil to coat all the kernels of corn
* turn on medium-high heat and wait for oil to heat up
* once hot, put in the corn kernels, stir to coat all kernels with oil and try to make sure that as many kernels as possible are in touch with the bottom surface of the pot (to get them heated up as effectively as possible)
* cover and wait for popping to cease
* occasionally shake the pot — whilst holding the lid on tight — to encourage all the kernels to pop
* occasionally lift the lid a crack to allow the steam to escape (or use the steam vent if your pot lid has one), but be careful not to open so wide as to allow popping corn to spring out!
* remove popcorn from pot, I put in a large plastic basket to allow the popcorn to cool down
* store in airtight containers as soon as it has cooled down as popcorn goes soft very quickly

As I try to avoid sugar, I go with salted popcorn and simply sprinkle salt on the cooked popcorn.

Gluten-free waffles

Gluten-free waffles

Gluten-free waffles

I’m afraid I’ve been very slack at updating my blog. The truth is I have experimented with several gluten-free waffle recipes, one of which was wonderful – but because I didn’t make notes, I can’t remember which one it was now :(!

The last recipe I tried was from the book Gluten-Free Baking with The Culinary Institute of America. This recipe uses ‘Flour Blend #5’ which of all the flour blends in the book, is the one with the highest protein content. As you can read in my earlier notes, I modified the flour mix slightly too. If my inference is correct, this could be the reason for these waffles having a rather bread-like texture. I personally prefer my waffles more crisp, so perhaps I should experiment with using different flour blends with this same recipe.

This recipe also uses additional whisked egg whites to add more lift to the batter (just as my grandmother’s waffle recipe does). Actually I haven’t noticed a huge difference between waffle recipes that used the extra egg whites and those that don’t (although others swear that whipped egg whites are critical). Since I’m lazy and would also prefer not to use up four eggs on one batch of waffles, I’d probably choose another recipe as my basic waffle staple.

One thing I do like about this recipe is that it’s not as oily as the first waffle recipe I tried. Overall, it’s quite a good recipe.

1 1/3 cups (7.7 oz) Flour Blend #5: rice, tapioca, soy flours – see here.
1/2 Tbs baking powder
1/2 tsp salt [omitted]
1/2 cup (4 oz) sugar [omitted]
2 eggs
1/4 cup (2 oz.) butter, melted
3/4 cup (6 oz.) milk
2 egg whites

1. Mix together dry ingredients.
2. Mix together wet ingredients separately.
3. Pour wet ingredients into dry and mix thoroughly.
4. Whip egg whites to medium peaks.
5. Temper egg whites by adding one-third of batter to egg whites and mixing gently.
6. Fold tempered whites into remaining batter.
7. Bake in oiled waffle iron.

Related posts:
A waffles novice
Four-grain waffles

Improvised gluten-free muffins (basic recipe)

improvised gluten-free pear muffins

improvised gluten-free pear muffins

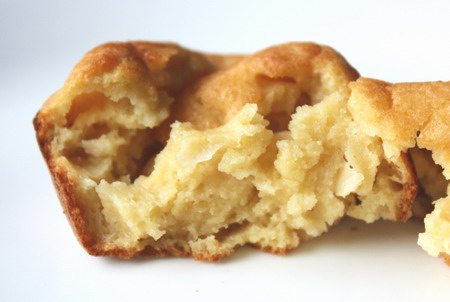
I remember the time when I was really scared to start gluten-free baking because it seemed so complicated, so many types of flour, so easy for things to go wrong, for the baking to fail. A couple of weeks ago, I baked some muffins (if you can call them that) without following any gluten-free recipe book and amazingly, the product was edible!

All I did was to try a direct substition of wheat flour with a gluten-free flour blend in my original basic muffin recipe. Yes, the very first basic muffin recipe, which I subsequently stopped using when I found basic recipe no. 2 gave better results. Basic muffin recipe no. 1 is so easy that you can easily by heart:

2 cups flour
1 cup milk/liquid
1/4 cup oil/butter
1 egg (2 , if you prefer)
1 tsp baking powder
other ingredients of choice – e.g. 1 chopped apple, handful of nuts/dried fruit etc.

I used exactly those quantities together with a few large chunks of tinned pears, and made up the 1 cup liquid with half milk and half pear juice from the tin. Apart from the pears and pear juice, no added sugar. (If you are avoiding salicylates, remember to choose pears in syrup as commercial pear juice contains the peel which has salicylates. Of course if you are on an anti-candida diet, the syrup is probably worse!)

The gluten-free flour blend is the one I described earlier:

8oz/225g brown rice flour
8oz/225g tapioca starch
8oz/225g soy flour

No xanthan gum, no gelatine.

The batter was extremely wet, but I decided to go ahead without adding extra flour. The consistency (and eventual effect) reminded on a crazy improvisation attempt when I dumped a load of mashed pumpkin into a gluten-free sponge cake recipe, thereby completely altering the ratio of liquid to other ingredients — a crazy attempt which I did not blog about because I can’t even remember exactly what I did (brain must have gone on strike, hence giving rise to the mad improvisation to begin with); started out being utterly disappointed with the result and subsequently very pleased when put aside my preconceptions and realised the texture was quite appealing and the taste pretty good.

The result:

It looked beautiful at the end of baking, but collapsed as it cooled after coming out of the oven, just as this gluten-free bean bread did. I’ve discovered the quick bread gluten-free recipe that doesn’t sink is this one that uses gelatine as well.

Taste-wise, I was very pleased although visitors to my home who tasted a bite responded only with a grimace masquerading as a polite smile :). Texture-wise, I’ll repeat what I’ve said in my other gluten-free baking entries; it reminds me of Southeast Asian kueh or steamed cakes, soft and very close-textured, no ‘crumb’, kind of squishy.

The overall effect of the non-wheat taste and texture is certainly very reminiscent of local desserts, so perhaps if I dropped names like ‘muffin’ or ‘cake’ and called it kueh, people would have different expectations and not react so negatively towards my gluten-free baking!

Gluten-free, yeast-free bean bread

Today I tried out the basic yeast-free bread recipe from The Gluten-Free Gourmet Bakes Bread by Bette Hagman, using the Four Flour Bean Mix described in my previous posting with the standard supermarket flours using in Indian cooking (Mustafa being the only supermarket I know that stocks them, though!).

The result was rather uneven: some parts did not rise much – the very smooth, close-textured parts – and other parts had huge air bubbles.

However, taste-wise and in terms of ‘mouth-feel’, I’m pleasantly surprised! The very green smell from the green bean flour disappeared after baking, and the bread was springy to the touch, much like real bread (despite the cake-like appearance). Actually, the texture reminds me very much of kueh lapis!

I tried it with a variety of savoury and sweet toppings as well as plain with butter, and it tasted fine every time. I couldn’t stop eating… how wonderful to be able to eat ‘bread’ and not be worrying about exceeding my wheat & gluten limit.

The recipe for a small loaf:

DRY INGREDIENTS

2 cups Four Flour Bean Mix : I used 1/3 part chickpea flour, 1/3 part green bean flour, 1/3 part sorghum flour, 1 part cornstarch, 1 part tapioca starch
1 1/2 tsp Xanthan gum
3 Tbs brown sugar [which I reduced to 2 Tbs – still rather sweet]
1/2 tsp baking soda
2 tsp baking powder

1 tsp Egg Replacer [omitted; Hagman uses this to provided additional protein and leavening power]
1/2 tsp salt

WET INGREDIENTS

Eggs – 2 plus 1 white [I used 3 small whole eggs, also because I omitted the Egg Replacer]
2 Tbs melted butter [replaced with ghee as I was too lazy to melt butter!]
1 Tbs honey [replaced with light argave syrup]
3/4 cup buttermilk [used substitute]
approx 1/3 cup water [used much, much less]

[Hagman also uses optional dough enhancer, which I have omitted completely here.]

Preheat oven to 180°C. Grease loaf pan(s) and dust lightly with rice flour.

Whisk together dry ingredients.

In a large bowl, beat eggs and egg white(s). Add melted butter, honey and buttermilk. Blend with mixer on low speed.

Add dry ingredients and continue to blend on low speed.

Add ‘sufficient water to make the dough the consistency of cake batter.’ This was the hard part! What is the correct consistency? I’ve seen a whole range of consistencies of cake batters. Anyway, using my judgement, I only needed to add about a tablespoon of water. The batter was strange-looking because of all those sticky flours, the cornstarch and tapioca starch, not at all like cake batter.

Beat 1 minute on high.

Spoon into prepared pans and bake for 55 to 60 mins, covering with aluminum foil after 30 mins.

Problems

* The bread rose tremendously in the oven the collapsed afterwards, which suggests that I should reduce the amount of leavening agent next time.

* The texture was very uneven, it did not affect the taste, but certainly is less than ideal. Bette Hagman constantly gives strict instructions to follow recipes exactly as substituting ingredients may end up with a different result. As usual, I can never follow a recipe precisely so I guess I will have to keep experimenting.

* Hagman also suggests that overly dense texture might be due too much liquid, and from my experience with muffins (which is what this essentially is – a muffin method, dry + wet ingredients then mix) is that it could also be case of over-mixing. I might just make this by hand next time; the mixer is unecessary and might have contributed to the over-mixing.

Verdict

Whatever the problems, I was really pleased with the result. I fear the little test loaf in the freezer won’t last long at all. Am definitely making this again, and at double the quantity :).

Here are Hagman’s quantities for a large loaf:

DRY INGREDIENTS
Four Flour Bean Mix (see above) – 4 cups
Xantham gum – 3 tsp
Brown sugar – 1/3 cup
Baking soda – 1 tsp
Baking powder – 1 rounded tablespoon
Egg replacer – 2 tsp
Salt – 1 tsp

WET INGREDIENTS
Eggs – 3 plus 2 whites
Butter, melted – 6 Tbs
Honey – 2 Tbs
Buttermilk – 1 1/2 cups
Water (more or less) – 1/2 cup

31/10/08 Update: experimented with this recipe a second time, making some tweaks and getting a much better result. Read more here: Improved recipe for gluten-free, yeast-free bean bread.

Chye tau kueh (fried savoury radish cake)

Recently, some friends gobbled down two plates of chye tau kueh from the hawker centre in front of me whilst I munched on my gluten-free carob muffin. They felt a bit guilty comparing their fried dish with my healthy snack but actually I really wished I could eat chye tau kueh too!

I came home and flipped through my mountain of cookbooks and finally found a somewhat poorly-written recipe for ‘Singapore-Styled Stir-Fried Turnip Pudding 星洲炒蘿蔔糕’ in a Hong Kong produced cookbook called Asian Snacks Cooking Course 亞洲小食製作教程.  Unfortunately, I couldn’t find a more authentic recipe in any of my Malaysian cookbooks (an excuse to buy even more :) ?!?). Anyway, it worked really well so am sharing here with you. You may want to compare this recipe with the one from Lily’s Wai Sek Hong.

This is a great snack option that’s wheat- and gluten-free, also no sugar. As long as you don’t find fried foods too unhealthy :).

INGREDIENTS FOR STEAMED RADISH CAKE

960g white radish/daikon
320g rice flour

Wash, peel and chop the daikon.

Use a blender to puree it, then using a sieve, squeeze out as much juice as possible. You need 3 cups of daikon juice.

Mix rice flour with daikon juice in a pot over low heat. The original recipe only uses the juice, but I put in all the daikon pulp as well so as not to waste it.

Stir until it the mixture thickens. This part requires careful attention as it can take quite a while to thicken on low heat but if the stove is too hot, it will clump together very quickly.

Pour the thickened batter into a greased mould, such as an aluminium cake tin. A 9-inch round tin is actually better than the one I used in the photo because it won’t be so full, and because the cake won’t be in such a thick layer, it will take a shorter time to be fully cook. Dark-coloured heavy cake tins are not good for steaming, they don’t seem to conduct heat very well.

Steam for 1 hour. Test for doneness with a chopstick, which should come out clean.


FRIED RADISH CAKE

Cut the steamed and cooled cake into cubes.

Fry ingredients of your choice until fragrant, such as garlic, shallots, minced meat, red or green chilli, spring onions. Add seasonings of your choice.  Traditionally, this is cooked with thick dark soya sauce and preserved turnip and preserved Chinese sausages are a must, with a special chilli sauce for those who like it spicy.

Add the steamed radish cake cubes and fry until browned.

Push ingredients to one side of the wok (or remove from pan), add a beaten egg and when semi-cooked, toss well with all the other ingredients.

My version shown below is cooked with salt (or organic tamari), garlic, stir-fried shallots, green and red capsicums, and topped with raw spring onions and deep fried shallots.

Verdict: close enough to the real thing to keep me happy! Loved the distinct daikon taste in the cake. Now if I can just figure out how to make preserved turnip or chye poh at home, the other members of the family might actually enjoy this as much as me :).

Nearly 1kg of daikon makes a lot of chye tau kueh and I had this in my lunch bento for days!! Next time I’ll only make half the quantity!

Breakfast: baked beans, brown rice cake & Chinese tea

Now I can join the rest of my family when they eat baked beans & toast for breakfast with my own version :)!

* homemade baked beans

* organic, salt-free brown rice cake from Lundberg — a crumbly rice cake, not as smooth a texture as Kallo brand, but then again, this one is brown rice. Most rice cakes are soft and taste stale straight out of the packed, especially Lundberg, but nothing a couple of minutes in the oven toaster won’t fix. Be careful as rice cakes burn easily, so set the oven toaster timer for just 2 minutes but leave the rice cakes in for 5 minutes to crisp up slowly in low heat.

* Pearl of the Orient tea from Gryphon brand — Singapore brand of gourmet teas in elegant packing. The extra-large fine mesh bags seem excessive but actually tea leaves need space to expand and release their full flavour. Gryphon’s Earl Grey is lovely (the brand’s best-selling tea in Singapore) but Pearl of the Orient, a jasmine+rose Chinese tea is definitely over-fragranced. Cheapest place to buy Gryphon teas is NTUC Finest at S$10.50 a box of 20 tea bags, $2 cheaper than chi-chi gourmet delis like Culina.

Baked beans – homemade & failsafe!

For ages, I have been watching my family members eating tinned baked beans for breakfast, unable to join in because of the tomato sauce which is high in glutamates, amines and salicylates (not to mention plenty of salt & sugar)!! The other day, I finally got down to making Failsafe baked beans from the recipe in the Friendly Foods cookbook.

The result was wonderfully satisfying! Even my family members who are used to the over-flavoured commercial version pronounced this ‘surprisingly edible’.

RECIPE

300g (1 1/2 cups) dried beans – navy, cannellini or flageolet
1 leek, washed and sliced
2 sprigs parsley
1 clove garlic, peeled
2 x 5cm pieces celery
2 Tbs soft brown sugar
1/4 tsp citric acid
3/4 tsp saffron threads [which I omitted, hence the anemic colour of my baked beans]
sea salt

Wash beans and soak overnight with 1.5 litres water. Drain the next day.

Place beans & leek in saucepan. A heavy-bottomed pot for slow-cooking is good, such as a cast iron pot. You can also use a crockpot.Main-Main Masak-Masak › Edit Post — WordPress

Tie the parsley, garlic and celery into a bouquet garni with a piece of string and add this to the pot.

Pour in enough water to cover the beans. Simmer uncovered for about 1 hour or until tender. Remove the bouquet garni.

Add the sugar, citric acid, saffron and salt to taste. Simmer for another 10 minutes.

Here I used dried organic navy beans which I bought at Nature’s Glory.

If you don’t have time to soak the beans overnight, you can use canned beans. It can be hard to find navy/cannellini/flageolet beans, but I’ve seen them at Carrefour and Cold Storage, as well as at health food stores like Eat Organic and Nature’s Glory. Basically, check the stores which stock more western ingredients.

With navy and cannnellini beans being more unusual products in Singapore, even the non-organic canned ones only come in relatively expensive foreign brands. The good news is that tinned, organic navy and cannnellini beans are available at about the same price as non-organic ones :), S$2.30 per tin for Eden brand. Other organic brands cost about a dollar more.

***************

6/12/8 Update:

Tip 1: Make a large batch, divide into serving portions and freeze. Defrost as necessary.

Tip 2: Aside from eating baked beans with bread (gluten-free bean bread for me) and rice cakes, it’s also good with rice. Especially quick and easy if you have cooked rice on hand at all times in the fridge or freezer.

Recently, I enjoyed a midnight snack of Japanese rice and homemade baked beans, topped with strips of Japanese nori seaweed — delicious!

Spelt pumpkin muffins (no sugar)

Here’s my first experiment with non-wheat flour. It really doesn’t taste very different, but that’s because spelt is actually a variety of wheat. Even if you don’t have an outright wheat intolerance problem, food rotation is a good idea.

I came up with this recipe after comparing the Pumpkin muffin recipes from the following books:
Diana Linfoot, Muffin Magic (Perth, Western Australia: Diana Linfoot, 1990)
Miriam Kasin Hospodar, Heaven’s Banquet: Vegetarian Cooking for Lifelong Health the Ayurveda Way
Mary Ann and Mace Wenniger, The Best-Ever Wheat and Gluten Free Baking Book

Spelt is not gluten-free so there really was no need for the last book, but it was still interesting to note the spices, raisins and nuts as well as orange juice used as milk replacement in the recipe (no citrus juices in large quantities for me – high in salicylates).

Both the vegetarian and gluten-free books’ muffin recipes use buttermilk or yoghurt, and I’ve found I prefer the texture from this mix than the old recipe I was using. I also use 2 eggs now instead of the 1 egg I did before.

The Ayurvedic book also melted ghee, butter or oil interchangeably for muffins, so I opened the first tin of ghee I’ve ever used . I already had it sitting in the cupboard, waiting to be experimented with.

For the flour mix, you can replace up to half a cup out of a total of two cups with alternative non-gluten flours.

You don’t need any sugar as the pumpkin, raisins and walnuts give this plenty of flavour.

speltpumpkinmuffins-0.jpg

Ingredients

1 1/2 cups wholegrain spelt flour
1/2 cup oat flour
1 tsp baking powder
3/4 tsp baking soda
1/2 tsp salt
2 tsp cinnamon

2 eggs
1/4 cup melted ghee
3/4 cup yoghurt
1/4 cup water

1 cup pureed cooked pumpkin (if you have extra you can freeze it)

1 cup chopped walnuts, lightly roasted by dry-frying without oil in a skillet over low heat – you may want to sieve out the tiny pieces which get burnt during the roasting process
1/2 cup sultanas

1) Sift together dry ingredients. This is important to combine the leavening agents and flours properly. If they are not evenly mixed, there will be large holes in your muffins. I often have a problem sifting wholegrain flours with leavening agents because the large flakes in wholegrain flour don’t go through the sieve and I can’t get at the smaller clumps of baking powder/soda to break them up and press them through the mesh. Right now, I’m trying to get round the problem by using my sieve which has a coarser mesh.

2) Mix wet ingredients together. Put the eggs in last, because if you mix raw eggs with hot melted butter you will get cooked egg (yes, this happened to me before!).

3) Mix the pumpkin puree thoroughly with the wet ingredients. I like to use a whisk for the wet ingredients.

4) Coat the raisins and nuts with flour to prevent them from sinking in the batter whilst baking.

5) Mix all the dry ingredients into the wet ingredients all at once quickly and lightly with just a few strokes. It’s ok if there mixture is clumpy.

6) Mix in the raisins & nuts.

7) Put into greased muffin tins. Paper casing is unnecessary. I have discovered that unless the cake has a high fat content (such as this cake recipe), it will stick to the casing. Pour water into any unused holes in the muffin tin to keep the tin from warping, and to produce steam which helps to create crispy tops on the muffins.

8) Bake at 180°C for at least 20 mins, or until toothpick comes out clean and muffins are fragrant.

Hummus

Blue corn tortilla chips with red lentil dip (top) and hummus (bottom).

My first encounter with hummus was when I started on the anti-candida diet and found hummus inside Xandria William’s Overcoming Candida cookbook. Recently, I’ve also seen hummus variations (no tahini, no olive oil) in Sue Dengate’s Failsafe Cookbook. It’s a dish that you can easily adapt to your own taste and desired consistency, so the recipes don’t need to be followed exactly at all.

The basic ingredients are:

1) Chickpeas — canned or cook your own from dried chickpeas. If cooking, soak them overnight (they will swell considerably), change the water, then bring to a boil and simmer, scooping away the froth. Cook for 1 1/2 to 2 hrs, or until soft enough to crush easily. Save the cooking liquid for pulverising stage.

2) Garlic. To taste. Xandria William’s recipe uses 2 cloves to 450g of dried chickpeas, whereas Sue Dengate’s uses 2 cloves to one 440g tin of cooked chickpeas!

3) Oil. For best flavour, use olive oil. But olive oil is also high in salicylates, so choose a failsafe oil if you need to (sunflower, safflower, canola, and most failsafers can also tolerate rice bran). My take on oil is also to avoid GMO foods if you can.

4) Tahini. To taste. Sesame seeds are high in salicylates, so omit tahini completely if you have to. If using tahini, do stir in the oil floating at the top properly first. In the photo above, the hummus looks very dark because I used tahini made from unhulled sesame seeds. This kind of tahini also has a stronger nutty taste.

5) A tangy flavour. To taste. Traditionally, it’s lemon juice, but again lemons are high in salicylates, so use the standard failsafe substitute – citric acid dissolved in a bit of water. Usually 1/4 tsp will be enough to produce the equivalent of a couple of tablespoons of lemon juice.

6) Salt. To taste.

7) Parsley, chopped. To taste.

Put all into a food processor and blend till smooth. Adding as much oil and chickpea liquid until you get the desired consistency.

Having just made a small tubful of hummus, I’m going to use it as:

a) a dip for my favourite Kettle’s organic blue corn or multigrain tortilla chips (shown in photo). They work out cheaper than Kettle’s non-organic potato chips even, and the blue corn chips are barely salted – fabulous! Food sensitive failsafe eaters will know that Kettle’s chips are better-tolerated than other commercial brands, which I myself have also personally experienced.

b) a spread for sandwiches, which can be combined with other sandwich fillings like roast chicken, roasted vegetables or salad.