‘Junk’ food: potato waffles

Sometimes one needs something junky to indulge in, and I was most impressed how unhealthy this tastes haha :D — must be the high fat content! This is a great snack that is free of gluten and sugar.

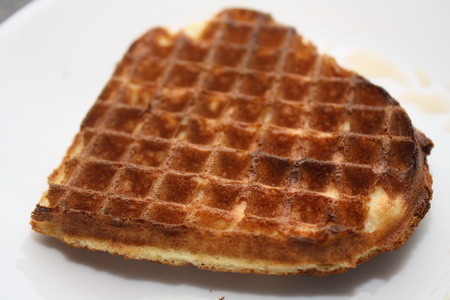
Making this potato snack or side dish couldn’t be easier. Simply make mashed potatoes by combining boiled waxy potatoes with butter, milk/broth/water, salt and pepper. Spoon into a waffle iron, which has been brushed with melted butter or oil.The final result was not crispy though….

Unlike some frozen potato products, by making this at home you can be assured that there are only natural ingredients.

‘Junk’ food: popcorn

When coated in artificial flavourings, tons of salt and/or sugar, popcorn can be very nasty (think of that fake butter smell from cinema popcorn — yuck!). However, natural popcorn is a great snack option which in its plain form is gluten-free, sugar-free, dairy-free and low in fat, so one can happily indulge!

Here’s how I make it:
* find a large pot with lid
* measure out the desired amount of raw corn kernels — I use three-quarters of one small rice bowl to make a huge salad bowl amount of cooked popcorn
* poor into pot just enough oil to coat all the kernels of corn
* turn on medium-high heat and wait for oil to heat up
* once hot, put in the corn kernels, stir to coat all kernels with oil and try to make sure that as many kernels as possible are in touch with the bottom surface of the pot (to get them heated up as effectively as possible)
* cover and wait for popping to cease
* occasionally shake the pot — whilst holding the lid on tight — to encourage all the kernels to pop
* occasionally lift the lid a crack to allow the steam to escape (or use the steam vent if your pot lid has one), but be careful not to open so wide as to allow popping corn to spring out!
* remove popcorn from pot, I put in a large plastic basket to allow the popcorn to cool down
* store in airtight containers as soon as it has cooled down as popcorn goes soft very quickly

As I try to avoid sugar, I go with salted popcorn and simply sprinkle salt on the cooked popcorn.

Food intolerance-friendly airline meals

Hello again after a long break! I have been away and will be travelling again soon so have some possibly helpful travel tips for anyone flying by Singapore Airlines.

The last time I went overseas by Cathay Pacific, I prepared an elaborate set of bento boxes to last me halfway round the globe, as I described here. This time, it was just a short 5-hour flight and I decided to order one of Singapore Airlines’ special ‘Medical Meals’.

Here is the amazing list of ‘Medical Meal’ choices:

  • Bland Meal: No “irritants” (e.g. black pepper, chilli powder, caffeine, cocoa, alcohol)
  • Diabetic Meal: No sugar; limited salt
  • Fruit Platter Meal: Fresh fruits only
  • Gluten Free Meal: No wheat, rye, barley, oats in any form
  • Low Sodium, No Salt Added Meal: Avoid naturally-salted, sodium-added processed foods (e.g. Baking powder, soda, MSG); no salt added during preparation
  • Low Calorie Meal: Limited fats, sauces, gravy and fried items; limited sugar-rich items
  • Low Fat/Cholesterol Meal: No animal fats but poly-unsaturated fatty acids allowed; limited fats, sauces, and gravy fried items; no butter, cream, whole milk cheese; only lean meat allowed
  • Low Fibre/Residue Meal: Limited fibrous items (e.g. fruit, legumes, vegetables, wholegrain products)
  • Non-Carbohydrate Meal: No starch and carbohydrates in any form
  • Non-Lactose Meal: No lactose and dairy products (e.g. milk, milk solids, casein, cheese, cream, butter, margarine)
  • Soft Fluid Meal: Mainly sieved, soupy items
  • Semi Fluid Meal: Mainly pureed, minced, easily digestible items (e.g. pureed vegetables, potatoes, fruits, minced, homogenized meat, porridge, congee)
  • Ulcer Diet Meal: Contains easily digestive plain poached/broiled foods (e.g. white meat, fish); no acidic food and fruits
  • Nut Free Meal: Please contact our Reservation Office for the necessary arrangement

After a short discussion on the phone with the airline staff, I chose the ‘Low Sodium, No Salt Added Meal’. On my return flight, the meal label was in Chinese, which said “無調味料”, which actually means  no added seasoning. I found out there is a option of Asian or Western versions, and I chose Western. It was a chicken breast with side vegetables and rice on the outgoing flight, and a very tender beef steak with side vegetables and potatoes on the return flight. There were also no sweet desserts. I loved the way they were all totally plain with no sauces or spices/herbs etc. yet the ingredients were flavourful enough on their own. Fabulous! Amines in the meats and salicylates in the vegetables aside, this is a pretty safe choice for me. No need to starve on long-distance travel anymore! (As long as I fly on Singapore Airlines, that is.)

P.S. Don’t forget Singapore Airlines offers also offers Religious Meals, Infant & Child Meals, a Seafood Meal and a range of Vegetarian Meals:

  • Raw Vegetarian Meal: Only raw fruits and vegetables
  • Vegetarian Oriental Meal: No meat or seafood of any sort; no dairy products; cooked Chinese-style
  • Vegetarian Indian Meal (non-strict): No meat of any sort; can contain dairy products; cooked Indian-style
  • Vegetarian Jain Meal (strict; suitable for Jain): No meat of any sort; no onion, garlic, ginger and all root vegetables; cooked Indian-style
  • Western Vegetarian (non-strict; ovo-lacto): No meat of any sort; can contain dairy products; cooked Western-style
  • Vegetarian Vegan Meal (strict): No meat of any sort; no dairy products; cooked Western-style

Gluten-free waffles

Gluten-free waffles

Gluten-free waffles

I’m afraid I’ve been very slack at updating my blog. The truth is I have experimented with several gluten-free waffle recipes, one of which was wonderful – but because I didn’t make notes, I can’t remember which one it was now :(!

The last recipe I tried was from the book Gluten-Free Baking with The Culinary Institute of America. This recipe uses ‘Flour Blend #5’ which of all the flour blends in the book, is the one with the highest protein content. As you can read in my earlier notes, I modified the flour mix slightly too. If my inference is correct, this could be the reason for these waffles having a rather bread-like texture. I personally prefer my waffles more crisp, so perhaps I should experiment with using different flour blends with this same recipe.

This recipe also uses additional whisked egg whites to add more lift to the batter (just as my grandmother’s waffle recipe does). Actually I haven’t noticed a huge difference between waffle recipes that used the extra egg whites and those that don’t (although others swear that whipped egg whites are critical). Since I’m lazy and would also prefer not to use up four eggs on one batch of waffles, I’d probably choose another recipe as my basic waffle staple.

One thing I do like about this recipe is that it’s not as oily as the first waffle recipe I tried. Overall, it’s quite a good recipe.

1 1/3 cups (7.7 oz) Flour Blend #5: rice, tapioca, soy flours – see here.
1/2 Tbs baking powder
1/2 tsp salt [omitted]
1/2 cup (4 oz) sugar [omitted]
2 eggs
1/4 cup (2 oz.) butter, melted
3/4 cup (6 oz.) milk
2 egg whites

1. Mix together dry ingredients.
2. Mix together wet ingredients separately.
3. Pour wet ingredients into dry and mix thoroughly.
4. Whip egg whites to medium peaks.
5. Temper egg whites by adding one-third of batter to egg whites and mixing gently.
6. Fold tempered whites into remaining batter.
7. Bake in oiled waffle iron.

Related posts:
A waffles novice
Four-grain waffles

Strawberry & pear agar-agar

This was part of my menu for a tea party. I had to choose some foods to suit the extremely hot weather at the moment, as well as things that would go well with Chinese tea. I flipped through my summer wagashi recipe books and decided that a co0l, non-melting kanten/agar agar dish would go down well.

strawberry & pear agar-agar

strawberry & pear agar-agar

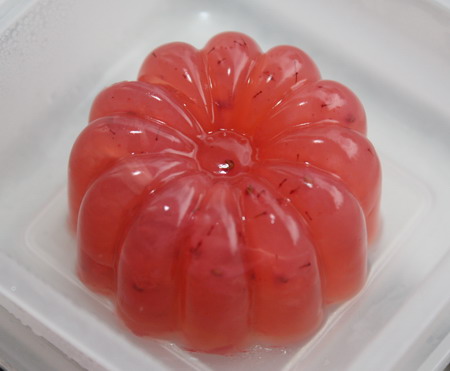
Started out planning green tea and red bean agar, but found my matcha had expired and turned a dusky brown colour *yuck*. Looking around in the kitchen for tasty alternatives, I found  some strawberries in the fridge — small Korean strawberries which, if you’re lucky, can be very sweet. This batch wasn’t, so I didn’t mind using them to make agar-agar instead of enjoying fresh with crème frâiche (Carrefour’s La Reflets de France premium house brand, great with scones too).

I put the strawberries into the microwave for a short while, then mashed them with a potato masher (a fork will also do). As there were only  a few strawberries, I chucked in some canned pears leftover from the improvised gluten-free pear muffins, and mashed up the whole lot.

Measured the fruit puree then added water to make up 1 litre. Put in quite a lot of sugar, which I normally wouldn’t do but since these were for a party, the tastebuds of the guests took priority over my own food preferences.

Heated the mixture and added the agar-agar powder according to the packet instructions, then chilled it in moulds. Super easy and they were a big hit!

The full tea party menu:
Strawberry & pear agar-agar
Pumpkin walnut sponge cake [adapted from this]
Earl Grey creme caramel [using this basic recipe]
Chinese “gong fu” tea: oolong and pu-er

Improvised gluten-free muffins (basic recipe)

improvised gluten-free pear muffins

improvised gluten-free pear muffins

I remember the time when I was really scared to start gluten-free baking because it seemed so complicated, so many types of flour, so easy for things to go wrong, for the baking to fail. A couple of weeks ago, I baked some muffins (if you can call them that) without following any gluten-free recipe book and amazingly, the product was edible!

All I did was to try a direct substition of wheat flour with a gluten-free flour blend in my original basic muffin recipe. Yes, the very first basic muffin recipe, which I subsequently stopped using when I found basic recipe no. 2 gave better results. Basic muffin recipe no. 1 is so easy that you can easily by heart:

2 cups flour
1 cup milk/liquid
1/4 cup oil/butter
1 egg (2 , if you prefer)
1 tsp baking powder
other ingredients of choice – e.g. 1 chopped apple, handful of nuts/dried fruit etc.

I used exactly those quantities together with a few large chunks of tinned pears, and made up the 1 cup liquid with half milk and half pear juice from the tin. Apart from the pears and pear juice, no added sugar. (If you are avoiding salicylates, remember to choose pears in syrup as commercial pear juice contains the peel which has salicylates. Of course if you are on an anti-candida diet, the syrup is probably worse!)

The gluten-free flour blend is the one I described earlier:

8oz/225g brown rice flour
8oz/225g tapioca starch
8oz/225g soy flour

No xanthan gum, no gelatine.

The batter was extremely wet, but I decided to go ahead without adding extra flour. The consistency (and eventual effect) reminded on a crazy improvisation attempt when I dumped a load of mashed pumpkin into a gluten-free sponge cake recipe, thereby completely altering the ratio of liquid to other ingredients — a crazy attempt which I did not blog about because I can’t even remember exactly what I did (brain must have gone on strike, hence giving rise to the mad improvisation to begin with); started out being utterly disappointed with the result and subsequently very pleased when put aside my preconceptions and realised the texture was quite appealing and the taste pretty good.

The result:

It looked beautiful at the end of baking, but collapsed as it cooled after coming out of the oven, just as this gluten-free bean bread did. I’ve discovered the quick bread gluten-free recipe that doesn’t sink is this one that uses gelatine as well.

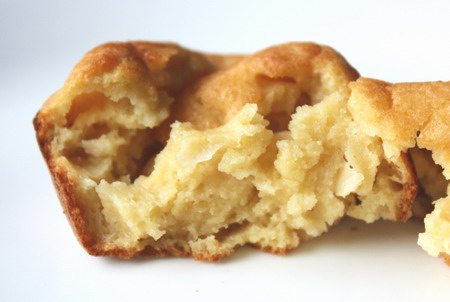
Taste-wise, I was very pleased although visitors to my home who tasted a bite responded only with a grimace masquerading as a polite smile :). Texture-wise, I’ll repeat what I’ve said in my other gluten-free baking entries; it reminds me of Southeast Asian kueh or steamed cakes, soft and very close-textured, no ‘crumb’, kind of squishy.

The overall effect of the non-wheat taste and texture is certainly very reminiscent of local desserts, so perhaps if I dropped names like ‘muffin’ or ‘cake’ and called it kueh, people would have different expectations and not react so negatively towards my gluten-free baking!

Weight-volume ratios in gluten-free baking

In my last posting giving a rice, tapioca and soy gluten-free flour mix, I provided the quantities in weight measures:

8oz/225g white rice flour
8oz/225g tapioca starch
8oz/225g defatted soy flour

These are also provided in the original recipe book,  Gluten-Free Baking with The Culinary Institute of America, in terms of volume measures:

1 1/2 cups white rice flour
1 3/4 cups  tapioca starch
2 1/4 cups defatted soy flour

However, it’s worth remembering that different flours have varying weight to volume ratios. Given that ‘alternative’ non-wheat flours can be prepared in many ways, one cannot be sure that the type used by the recipe book author is the same as the one you are using. For example, I’ve noticed that white rice flour produced for Chinese cooking seems to be finer and more white than white rice flour available in Indian grocery shops, and of course these are quite different from the brown rice flour from the organic shop.Even for regular, non-gluten-free baking, it’s always better to use weight measures for accuracy. (See also my page on Flours.)

In Gluten-Free Baking with The Culinary Institute of America, the base measurement is in weight, as each flour blend recipe makes up 1.5lb, so it’s better to go with the weight measures rather than the volume measures.

In my case, I also substitute flours a lot. As I mentioned, I replaced the white rice flour with brown rice flour and defatted soy flour with regular organic soy flour (US product, purchased in Phoon Huat; possibly different from Asian soy flours and homemade soy flours). So if you are a reckless substituter like me — I must be congenitally predisposed to being unable to follow recipes exactly :) — always use weight measures.

After substitution, these are the approximate weight-volume ratios I ended up with — quite different from the ones in the recipe book:

8oz/225g brown rice flour = slightly less than 1 3/4 cups
8oz/225g tapioca starch = 1 3/4 cups + 1 Tbs
8oz/225g soy flour = slightly less than 2 cups

Gluten-free flour mix: rice, tapioca & soy flours

When it comes to learning about baking, I swear by the detailed explanations of baking theory as well as excellent recipes in Baking at Home with the Culinary Institute of America, so I was thrilled to find a new book from the Culinary Institute of America on gluten-free baking, Gluten-Free Baking with The Culinary Institute of America by Richard J. Coppedge Jr.

The most important principle I’ve learnt from this book is considering the protein content of flour mixes, and then selecting flour of the appropriate protein-level for the recipe. This is similar to using standard wheat flour of differing protein levels in the form of cake flour, pastry flour, bread flour etc. In Chinese language, wheat flour is labelled as low, medium or high protein. Do take a look at the page I wrote earlier about flour, including points on protein levels.

In Gluten-Free Baking with The Culinary Institute of America, Richard Coppedge gives five different flour blends listed in order of protein content. In the 150 recipes in the book, he uses each flour blend according to the texture required. Often he also uses a mixture of the different flour blends to refine the final product.

The only flours he uses are:

white rice flour
brown rice flour
potato starch
tapioca starch
soy flour, defatted (the natural oil content has been removed resulting in a higher percentage of protein content; defatted soy flour is noted to improve crumb body resilience, produce a more tender crumb, crumb colour and toasting properties, make smoother batter and give a more even distribution of air cells; see here and here)

as well as:

guar gum
albumen
whey powder
[BTW, can anyone tell me where to find albumen and whey powder in Singapore?]

Not being quite as fussy or precise about my baking results, I haven’t been following his recipes exactly, but simply putting together the flour blend that I find most convenient. Besides, not having albumen and whey powder, I’ve been unable to make up Flour Blend #3 (moderately strong; made with white rice flour, potato starch, guar gum and albumen) not Flour Blend #5 (the strongest; white rice flour, tapioca starch, defatted soy flour, whey powder).

Having already tried Flour Blend #2 (second weakest; white rice flour, brown rice flour, potato starch, tapioca starch) several times, I got some soy flour (not defatted though) to try an adaptation of Flour Blend #4 (stronger; white rice flour, tapioca starch, defatted soy flour). The proportions are:

8oz/225g white rice flour [which I replaced with brown rice flour]
8oz/225g tapioca starch
8oz/225g defatted soy flour [I used regular soy flour; using brown rice flour instead of white rice flour helped to raise the overall protein conten]

As compared to the gluten-free recipes posted earlier which use bean flours liberally, this flour blend has less of a strong taste.

Report of muffin recipe using this rice, tapioca & soy flour mix coming soon.

Sorghum scones (gluten-free)

Happy Lunar New Year and wishing everyone good health (isn’t that the most important thing?) in the Year of the Ox ^_^!

Here is quick bread recipe from The Best-Ever Wheat and Gluten Free Baking Book but a change from my usual muffins.

Sorghum is grain commonly used in South Asian, where it is known as jowar (see my page on gluten-free flours in Indian cooking). Prior to my interest in gluten-free flours, I had only heard of sorghum in the context of the Zhang Yimou movie “Red Sorghum” 高梁, starring Gong Li, which takes place around a distillery for sorghum liquor.

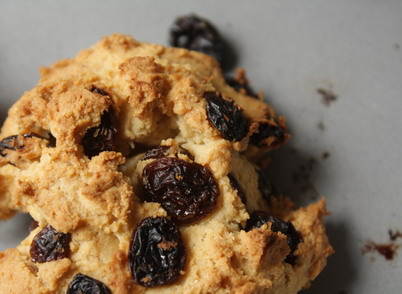
These scones have a hard, crisp shell, perhaps reminiscent of rock buns, quite different from English scones. Unlike cake-like muffins which can be heated up in a microwave, wrapped in a paper towel, these scones need to be reheated in an oven bring out the crisp texture of the crust.

Gluten-free sorghum scones

Gluten-free sorghum scones

I made some tweaks to the recipe in the book to omit cumin, salt and sugar. Below are the ingredients I used.

DRY INGREDIENTS

1 1/2 cups (175g) sorghum flour
1/ 2 cup (60g) tapioca flour
1/2 cup (80g) brown rice flour
1 1/2 tsp cream of tartar
1/2 tsp baking soda
1 tsp xantham or guar gum
1/2 cup raisins

WET INGREDIENTS

4 Tbs (55g) butter
2 eggs, lightly beaten
1/2 cup (160g) plain yoghurt or 1/2 cup (120ml) milk

1) Preheat oven to 230°C.
2) Mix dry ingredients.
3) Beat the butter with hand mixer as if creaming (the original recipe involves creaming butter and 30g sugar).
4) Add beaten eggs and yoghurt to butter.
5) Add dry mixture to wet mixture and stir until just combined.
6) Stir in raisins.
7) Spoon the dough into large mounds onto a greased baking sheet, as I did. Alternatively, pat into a large round to be cut into wedges after baking.
8) Bake for 12 to 15 mins. Be careful they don’t burn. You might want to turn down the oven temperature halfway through or cover the scones with tin foil.

Verdict: Super! Tastes great, nice texture, easy to make. Delicious plain or with butter or cream and jam.

Gluten-free muffins with bean, rice & tapioca flours

Muffin with chickpea, rice and tapioca flours
This recipe is from The Best-Ever Wheat and Gluten Free Baking Book and like the other recipes from this book I’ve used, it turned out excellently. The book credits the recipe to the Bob’s Red Mill website by Carol Fenster, of which this is an adaptation. It’s actually a recipe for Blueberry Muffins but I didn’t have blueberries so I adapted it with the dried fruits in my fridge — sultanas and cranberries.

If you’ve read my posting on Gluten-free, yeast-free bean bread or my improved recipe for gluten-free, yeast-free bean bread, you’ll notice this flour mix also uses chickpea (garbanzo) bean flour and tapioca flour, although the other flours and proportions are different. An additional ingredient here is the gelatin powder, which I purchased in Phoon Huat. Like the bean bread recipe, this uses the muffin method (explained here).

And the results of this recipe are actually much better than the earlier bean bread ones! There’s only very minimal sinking of the muffin tops after baking, and the inner texture has more even rising, with no centre that is denser than the outer sections.

A highly recommended basic recipe.

DRY INGREDIENTS

1 cup (140g) chickpea (garbanzo) bean flour and/or fava bean flour [I used all chickpea flour from the Indian grocery store]
1/2 cup (110g) rice flour
1/2 cup (80g) tapioca flour
2 tsp flaxseed meal
1 tsp unflavoured gelatin powder
2 tsp xantham gum
2 1/2 tsp baking powder
1/2 cup (100g) sugar or 170g honey [omitted]
1 tsp sea salt [omitted]

WET INGREDIENTS
1 cup (235ml) milk – rice, soy, nut or dairy milk
1/2 cup (55g) butter, softened [I used coconut oil instead as too lazy to melt the butter]
3 eggs
1 tsp vanilla extract
1 cup mixed dried fruit [original recipe calls for 1 Tbs grated lemon peel and 1 cup blueberries]

1) Mix dry ingredients together.
2) Whisk together wet ingredients.
3) Combine wet & dry ingredients. Stir till just mixed, be careful not to overmix.
4) Fold in fruit.
5) Bake in preheated oven at 200°C for 25 mins.