Cutie cutie bread making toy!

If you like kawaii character bento, I’m sure you’ll love this! It’s a ‘toy’ called Konepan that helps you to knead and shape bread dough into cutesy shapes which can then be baked in a regular oven. Watch a movie of how it works here. NOT a substitute for a real bread machine :D.

konepan1.jpg

konepan21.jpg

Link via TokyoMango.

Tahini soy muffins (no sugar)

Looking at my stocks, I realised I had some recently-expired kinako to use up so I decided to make nutty no-sugar muffins using kinako (soya beans) and tahini (sesame). You can buy kinako in Japanese grocery stores or Daiso, or even make it yourself from roasted soya beans. This was pretty experimental and I improvised all the way through, using a buttermilk muffin recipe as a base.

Incidentally, to give sugar-free muffins a bit more kick, eat them preferably hot, with salted butter, plain yoghurt, cream cheese or fresh cream (^_^) **mmmmmm**….

img-82821.jpg

Ingredients

[N.B.: If you want to stick more strictly to anti-candida principles, then omit the pine nuts and replace dairy milk with alternatives.]

1 cup plain flour
3/4 cup wholemeal flour
1/4 cup kinako
2 Tbs okara [because I happen to have plenty lying around after making soya bean milk] — be sure to grind to fine powder
1 tablespoon black sesame & walnut powder [a packaged powdered grain drink, can omit]

11/2 tsp baking powder
3/4 tsp bicarbonate of soda

handful of toasted pine nuts as desired

1 egg
3/4 cup soya bean milk
3/4 cup buttermilk [which I substituted with plain milk + 1/4 tsp citric acid]
30g melted butter – about 1/8 cup
3/8 cup tahini made from unhulled sesame seeds [I put the melted butter into measuring cup and added tahini up to total of 1/2 cup]
1 tsp vanilla essence

1) I sifted all the dry, powdered ingredients together.
2) Then stirred in pine nuts.
3) In another bowl, I combined egg, soya bean milk, buttermilk, butter and tahini.
4) Added dry ingredients to wet, mixed quickly in a few strokes till just mixed. Did not want to make the mistake of over-mixing which would make the muffins heavy and too dense. Although initially there seemed to be quite a lot of liquid, the mixture was just nice.
5) Preheated oven to 200℃. On previous attempts, my muffins never seemed to rise much so I decided to try a higher temperature and it seems to have worked. The muffins were done in precisely 20 mins as well. I suspect my 15 year-old oven is not as hot as what is the temperature dial but I’ll need to get an oven thermometer to check.

These taste delicious, even at room temperature! Plus the texture is the best of all the batches of muffins I’ve made recently (read about my muffin problems here). They are just right, not at all gummy, not too dry and the crumb texture is fine and even without much tunnelling.

Now the only thing is, the crack appears on the side of the muffin top, not in the centre. Maybe I’m just being silly here but I want my muffins to look perfect too!

Because the tahini I used was very dark brown in colour, these muffins came out in this deep colour. So the colour isn’t actually from the miniscule amount of black sesame powder but from the unhulled seeds in the tahini (which was made from normal white sesame seeds, not black sesame seeds).

Vegetarian bento: chap chye bee hoon

img-82951.jpg

Another vegetarian bento (ditch the omelette strips in the bee hoon and this would be vegan) that also tries to be anti-candida, plus low in salicylates, glutamates and amines.

Main dish:
* fried bee hoon (rice noodles) with garlic, cabbage, omelette strips, topped with fried shallots; seasoned with salt only;
* chap chye: dried soya mince, dried soya bean sticks (foo chok [Cantonese], 腐竹), Japanese freeze-dried kouya tofu (read more here and here) cut into chunks [I love the taste and texture of this style of tofu, which I only tried for the first time a few weeks ago], strips of konnyaku, cabbage, mung bean noodles — braised with a tiny bit of chopped garlic and miso.

Side dish:
* chunks of fried homemade tofu –> my first taste of my first homemade tofu!!
* cut-up pear.

Vegetarian bento lunches

Recently I had to pack a series of bento lunches that were vegetarian, as well as taking into my sensitivities to salicylates, glutamates and amines, not to mention avoiding foods that aggravate candidiasis. Now that was a major creativity challenge! I also made an effort to plan more variety between each of the meals than I usually do and also to splurge a bit on as much organic ingredients and produce as possible. Salt is the only seasoning used in the savoury dishes shown here.

The most suitable box for these lunches was the EZ-Lock compartmentalised box, which I described here. In my earlier posting, I commented that it’s normally too big for a single meal for me, but I managed to eat up most or all of the food in these vegetarian bento.

Vegetarian bento 1

img-79751.jpg

* Origins Healthcare wild rice + brown rice blend. My current favourite brown rice, unlike many brands, it doesn’t have a stale & rancid taste.
* fried taukwa (firm tofu) stuffed with shredded cucumber, to be eaten with pureed pumpkin (orange contents of smallest section on left) and topped with toasted pumpkin seeds (inside blue mini condiments container). Based on this recipe, minus all the sauces and seasonings.
* stir-fried broccoli with chopped garlic

Vegetarian bento 2

img-80021.jpg

* Origins Healthcare wild rice + brown rice blend
* stir-fried brinjal and cubes of fried taukwa with caramelised onion
* dhal with onions, garlic and little bit of red capsicum, no curry spices
* raita (live cultures yoghurt + chopped cucumber) — packed with mini ice pack, which I melted and bent into the shape of container, then put the whole bento container into the freezer to solidify the ice pack into shape.

Vegetarian bento 3

* couscous, cooked with garlic, onions, raisins, dried cranberries plus toasted pecans, raw tomato, cucumber and spring onions. This was delicious but not at all a good dish for my dietary restrictions! Anti-candida diets should not include nuts and dried fruit or refined pasta — which is what couscous is; tomato intake must be monitored for salicylate and glutamate levels, although fresh tomato is much better than tomato products.
* Japanese sweet potato, satsumaimo, with caramelised onions
* stir-fried broccoli with chopped garlic

Vegetarian bento 4

* vegetable okonomiyaki with onions, bean sprouts, cabbage, carrots, dried soya mince. I happened to find some organic yamaimo, which inspired me to make this.
* dhal, leftovers see vegetarian bento 2 above
* guava fruit

I also had a fifth vegetarian bento but I forgot to take photos . It was Chinese stir-fried noodles (organic wholewheat) with garlic, onions, bean sprouts, carrots, red capsicum and egg. The side dishes were slices of raw cucumber and cubes of guava fruit.

Apple soy muffins (no sugar)

img-8063.jpg

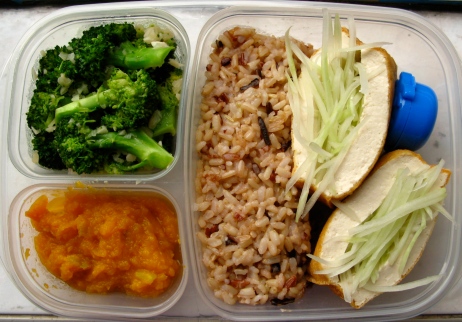
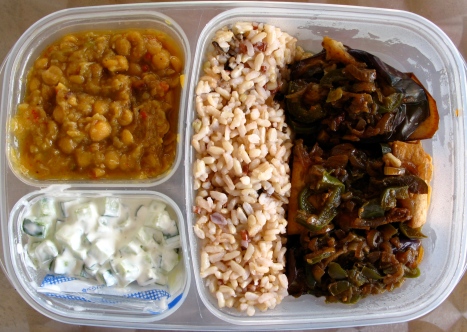
I’m back on the anti-candida diet so that means no more sweet snacks for the time being. No matter what Sue Dengate says about the counter-productiveness of combining anti-candida with Failsafe diets, I’m trying! It seems pretty logical to stay off sugars that feed the growth of yeast in the body. I think I’m experienced enough at trying to manage both individually to attempt to do both together. Recently I had to make a series of bento that were suitable for a vegetarian environment. Now that’s a major creativity challenge (admittedly, I didn’t keep to either an anti-candida or Failsafe diet strictly for that whole series of vegetarian bento :P)!

Frustrated with the less-than-satisfactory muffin results of my last batch (see the update on Green tea, azuki bean and pine nut muffins), I decided to make some apple muffins, which were my fortnightly staple — alternating with scones — when I was following the anti-candida diet a few years ago. Apples provide flavour and a hint of sweetness, and I’ve even had friends unable to detect the complete absence of sugar.

This time I decided to try something a little different. Have been thinking of trying a buttermilk muffin recipe for some time, hoping that the buttermilk will provide a bit more lift in the batter. It just so happened that I came across one in an Ayurvedic vegetarian cookbook I recently picked up, Heaven’s Banquet by Miriam Kasin Hospodar. I like the detailed explanations about each category of recipes, the thorough background information makes this book much better than simply a collection of recipes. The book has a half page on the ‘The Seven Pillars of Eggless Muffin Wisdom’, the last being that ‘eggless muffins become leaden and clunky if they sit too long, so it is best to bake them just before serving’. That didn’t sound so good to me, especially after suffering heavy gummy muffins of late, so I decided to keep the 1 egg I have been using all along, but adapt the instructions for including buttermilk+bicarbonate of soda (which react with each other, as I explained here).

I also made soya bean milk yesterday, with okara as a by-product, so I added in a handful of dried okara into the flours. This is supposed to help produce a lighter texture.

Ingredients

1 cup wholemeal flour
1 cup plain flour
handful of okara
1 tsp baking powder
3/4 tsp bicarbonate of soda
cinnamon, generous sprinkle (approx. 1 tsp?)

1 apple, chopped

3/4 cup yoghurt [to replace buttermilk; there’s a large tub of yoghurt with live cultures in my fridge to assist in the anti-candida diet]
1 cup soya bean milk
1 egg
1/4 cup oil

1) Sift dry ingredients together.
2) Toss apple bits in flour mixture.
3) Mix together wet ingredients.
4) Put all of the dry ingredients into wet mixture. Combine quickly till just mixed, about 15 strokes. Over-mixing will produce a heavy muffin.
5) Bake in preheated oven. I made it hotter than the 180℃, which I used to use, by using the ‘fan bake’ function. Hospodar’s muffin recipe recommends 200℃. Bake until golden brown and fragrant, 20-30 mins. I had a really big apple so there were lots of apple bits that made the surrounding batter soft and wet, even when the muffins were done, so skewers didn’t come out clean but upon dissecting a muffin, they seemed to be ready.

Recently, for some reason I seem to have lost my ability to determine whether something in the oven is done. The baking instructions never seem to be right and skewers come out clean but they aren’t done, or skewers are not clean but they seem ready. I’m beginning to wonder about the temperature control in my rather old oven; will have to invest in an oven thermometer. Another problem is having the baking trays on different racks on the oven, necessitating switching them around half way to ensure even baking. This never works for me though – the lower rack inevitably gets less heat at the all-important initial rising period so that tray is always not as good. I also must start paying more attention to my bakeware as dark and silver surfaces produce different results.

img-8110.jpg

You can see an airy texture inside, without large tunneling or the gummy texture of the green tea muffins.

But guess what, I forgot to crush the dried okara chunks into a fine powder texture, so I ended up with these dry airy bits inside (the white part in the centre of photo). Okara is tasteless and I don’t really notice these dry chunks, but they don’t really add anything to the muffin, so it would be better to have all the okara crushed into a coarse grain instead.

To serve these sugarless muffins to friends and family with more conventional tastes, I cut a small hollow in the centre of each muffin and filled it with jam or marmalade.

I often don’t use paper cases because it’s wasteful and unnecessary. In this case, I wanted to make the muffins more presentable to give to friends, and also I used the paper cases to measure out smaller muffins (as compared to the giant size of normal muffin tins). I have a stack of 1000 paper cases to use up anyway (yes, that is the standard pack size in baking stores, or you can get packs of a few tens for an exorbitant price at supermarkets).

One problem of paper cases is that some of the muffin will stick to the paper. Muffins stick to the paper cases much more when they are hot; at room temperature, the paper cases will peel off relatively nicely, though there is the small problem of paper fibres sticking to the muffin (rather than bits of muffin sticking to the paper). [29/6/08 update: the more expensive glazed paper cases have less muffin sticking to them; they usually come in black or dark brown (think of the cases for expensive chocolates).]

Buyer beware

Organic shoppers in Singapore might want to take note of this letter which appeared in the Straits Times Forum Online recently.

STRAITS TIMES

June 17, 2008

Premium charges but services anything but premium

I BOUGHT six packets of Australian Rolled Oats from Organic Paradise Pte Ltd but one of the packets was full of weevils. When I returned to the store to exchange it, the cashier told me there was no exchange policy, and that it was my fault not to check the goods before buying.

As I did not have time to go to my regular organic store, I had to restock another six packets of oats from the same store. The cashier once again told me to check for weevils before paying, as there was no exchange policy.

This compares with major supermarkets such as the Cold Storage chain which have an exchange policy for defective products. Also, the salespeople would make the exchange for defective products apologetically.

In another incident, I went to Phyto Organics on two different occasions. Two salesgirls recommended me two different eye creams. The second salesgirl said that the first eye cream I had bought was too oily for me and that it may cause oil seeds on the eye area. I ended up with two different eye creams as there was no exchange policy, even though I have not used the first eye cream.

Department store counters, however, are usually more consistent with their product recommendation. They also have an exchange policy when they recommend an unsuitable product or a wrong foundation colour. This is applicable even after the product has been used.

As I was switching to organic products, Phyto Organics also recommended me an organic foundation. The salesgirl claimed that it does not clog my pores like other non-organic skincare/cosmetics brands I have used. This is a claim that none of the major skincare/cosmetics brand salesgirls have ever made to me. So I bought it. I found out later that the foundation colour was too dark and oily for me but Phyto Organics disallowed an exchange, even though I bought over $700 worth of products from them.

It’s disappointing that these two organic establishments sell ‘premium products’ and charge premium prices but they do not provide the premium services generally associated with major department stores and supermarkets.

Juliana Tan (Ms)

Blender bottle

img-79362.jpg img-79392.jpg

I came across this in a cookware shop in Britain, Lakeland, which always has interesting and high-quality equipment and gadgets. It’s a plastic bottle with a pouring spout that has a coiled metal ball inside that helps to shake up the contents. Just snap shut the leak-proof spout and you can store the contents in the fridge for later, and when you’re ready to use, a quick shake will quickly blend it all together. Amazingly, nothing gets stuck in the corners, it all mixes up beautifully.

For me, so far I’ve found it great for:
* powdered beverages, especially those cereal grain drinks where the cereal bit tends to settle at the bottom.
* waffle, pancake and poh piah skin batter — stores well in fridge so you can have pancakes & skins ready in seconds!
The official Blender Bottle website also suggests:
* sports drinks
* French toast batter
* eggs
* gravies
* pudding
* marinades
* and ‘On the Go!’ [will the Blender Bottle appear in my bento bag some day ?]

If you’re looking for them in Singapore, I happened to chance upon them in GNC, in the bodybuilding supplements section as they’re used for making protein shakes. The ones in GNC are 28 oz (830ml) capacity, bigger than the one in my photo, which is 20 oz (590ml), and sold for about S$20.

The official Blender Bottle website has full specs and details of the type of plastic & stainless steel used as well as photos and testimonials.

Brown rice and golden syrup slice

img-79532.jpg

Unlike the brown rice steamed cake I tried a couple of months ago that went straight into the bin, this brown rice cake turned out rather well. One friend described them as tasting just like those ‘piglet’ mooncakes made from the batter of baked mooncake skin (see recipe here). In fact the method of making mooncake skin is remarkably similar to this brown rice golden syrup slice, except that mooncake skins use normal plain wheat flour, not rice flour. Some mooncake batter recipes even use golden syrup too!

This recipe is taken from the ‘Friendly Foods’ cookbook so is great for those with food intolerances. It’s low in natural food chemicals (salicylates, amines & glutamates) and free from egg, dairy, gluten and soy.

Ingredients

oil, for greasing
495g (3 cups) rice flour [I used organic brown rice flour with wonderful results]
1 1/2 tsp bicarbonate of soda
1/2 cup golden syrup [reduced from 1 cup]
125ml (1/2 cup) oil
1/2 cup soft brown sugar [reduced from 1 1/2 cups]
185ml (3/4 cup) warm water

1) Sift flour and bicarbonate of soda into a bowl.
2) In a saucepan, combine golden syrup, oil and sugar. Stir over low heat until sugar dissolves, 3 to 4 mins. Allow to cool.
3) Add syrup and warm water to dry ingredients. Stir until combined and pour into greased and lined baking tin of 20 x 30cm dimensions.
4) Bake in preheated oven at 180℃ for 45 mins or until golden. Allow to cool in tin for 5 mins before turning onto a wire rack to cool completely.

Verdict: a new baking method for me, which I’d never tried before and the result was very satisfactory. The cake doesn’t rise much and is extremely crumbly. I wish I had put more effort into spreading the batter out in the pan evenly as I ended up with some parts thicker than others.

The main problem was that even with drastically reducing the amount of golden syrup & brown sugar, this was reeeeallly reeeeally sweet. I had to temper the sweetness by eating it with fresh thick cream (as shown in the photo) or cream cheese — both extremely delicious *yum* (^_^)! Can you imagine the original recipe also includes a sugar icing?!?

I stored the cake in the freezer and put them in snack bento in the morning, leaving them to defrost naturally over the course of a few hours. Determined to enjoy the yummy pairing with cream cheese, I put some into a bento condiments container, then put that into another box with a tiny bento ice pack. 8hrs later, the cream cheese had survived and I had a wonderful tea time snack (^_^).

9 to 5 bento

A friend saw me with all this and asked if I had brought the entire kitchen! This is a typical set-up if I want to stay happily-fed for an entire day. It can be quite a lot to lug around if I’m on the move, but it’s fine if I’m staying in the same location all day.

img-78124.jpg

Apart from the rice cooker and the kettle in the background, this is my lunchbag and its contents:
* drinks: 1 litre water bottle, 500ml insulated mug-style flask
* 1 lunch bento
* 4 snack bento
* plastic fork & spoon
* oshibori

img-77994.jpg

The lunch in 630ml Asvel bento box: organic wild rice blend (Origins Healthcare, available at NTUC – my favourite brown rice!); kabocha Japanese pumpkin stir-fried with shallots; fish braised with enoki mushrooms, shallots and a tiny bit of miso.

img-78024.jpg

Left to right (in E-Z Lock boxes): brown rice cookies; butter cupcakes with maple cream cheese frosting (the frosted one is a bit smashed on top from the bento box lid; for lunchbox-friendly frosting method, slice out the top, put in frosting and replace the ‘lid’); dragon fruit; oolong tea konnyaku jelly. [Full recipes coming soon.]

img-78134.jpg

Mini sweet potato cupcakes (in white box with orange lid). [Recipe maybe coming soon, these were a semi-disaster, not sure if it’s worth sharing the recipe at all and reinforced my perception that baking recipes in Chinese cookbooks often look rather odd :P .]

img-78042.jpgimg-78052.jpg

Kukicha is a great barely-caffeinated hot drink to sip throughout the day. However, I learnt the hard way that if brewed too strong and drunk in too large quantities, it has a serious laxative effect on me! This could be my particular food sensitivities at work, might not be the same for everyone. The brewing instructions on the packets of western brands of Asian teas can often be completely wrong. While black teas such as English breakfast should indeed be brewed at 100℃ for 3 to 5 minutes, this is never the case for Chinese, Japanese and Korean teas. Kukicha, hojicha and mugicha/boricha should be brewed with 100℃ but only for 15 to 30 seconds. The flavour should be delicate, not overly-strong.

Sometimes I even carry my insulated flask/mug empty to events where refreshments are provided so as to avoid using unenvironmentally-friendly styrofoam cups — plus I also get to sneak my hot drink inside when everyone else has had to finish theirs in the food area .

img-78061.jpg

Essential equipment:. oshibori from Daiso and reused airplane plastic cutlery. Sometimes I use these foldable chopsticks instead.

Steamed yam cake 芋頭糕

One of the most popular reads on this blog is my posting on steamed Chinese radish cake 蘿蔔糕. The same basic recipe can be adapted for a whole range of other root vegetables — such as pumpkin, sweet potato or yam — and a supporting cast of ingredients. These are traditionally preserved Chinese sausages and meats, dried shrimp, dried Chinese mushrooms etc., but you can substitute anything of your choice.

As I discovered with the steamed radish cake, it’s also no problem to omit the secondary ingredients and still have a tasty dish, especially if you are trying to cater to food sensitivities and avoid nasty preservatives. This is a good recipe for food rotation and avoiding wheat, gluten (does the 1 Tbsp of cornflour count?), sugar etc.

This time round I used a yam (a ‘real’ yam, not the taro I have been calling ‘yams’), and a slightly different flour mixture from the radish cake. This recipe is based on a ‘Five Spices Yam Cake’ from the bilingual cookbook, ‘Steamed Cake & Kuih Muih 蒸蛋糕與糕點的喜悅’ by the Malaysian publisher, Famous Cuisine.

steamed-yam-cake-medium3.jpg

Ingredients

400g yam (peeled and cubed)
handful of chopped shallots

For batter:
300g rice flour
1 Tbsp cornflour
1 Tbsp wheat starch
1 1/2 tsp salt
800ml water

1) Mix batter ingredients well, using hands to make sure that all lumps of flour are dissolved.
2) Stir fry the shallots until fragrant, then add yam cubes and fry till they are cooked.
3) All filling to the batter, keep stirring on low heat till it thickens. Be careful as the corn flour causes thickening very quickly.
4) Remove from heat and pour into a steaming tin.
5) Steam in preheated steamer at high heat for 35-40 mins or until cooked through. Leave to cool.
6) Serve with toppings of your choice, for example – as shown in photo:
* homemade chili sauce made from fresh pounded chillies only
* chopped spring onions
* fried shallots
Other possible toppings:
* sesame oil
* sesame seeds
* dried seaweed such as nori strips or aoi nori
* furikake
* soya sauce (for those who aren’t sensitive to it!)

This steamed cake turned out more firm than the radish one. And while the radish was cooked until it disintegrated and mixed with the flours to form a smooth batter, in this recipe, the yam and shallots floated to the top creating a distinct layer. This is most delicious eaten steamed & warm, but also great for bento.